What 1-Bit Dither Does
You have an image with 16 million colors. You're going to express it using two: black and white. Dithering decides where each one goes.
You can try these algorithms immediately in your browser with our free Dither Converter.
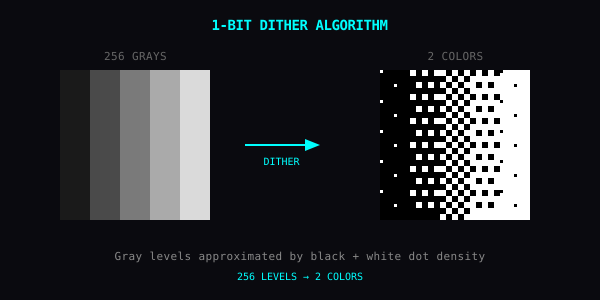
The illusion of gray comes from dot density. Lots of black pixels close together = looks dark. Sparse black on white = looks light. Stand back from the screen — your eye averages it.
Four Algorithms
Each produces a distinct look. Try all of them on the same image.
Threshold
Pixels above the threshold become white, below become black. No mixing. Hard, posterized. Best for high-contrast graphics and logos.
Floyd–Steinberg
Error diffusion: when a pixel rounds to black or white, the leftover "error" is pushed to neighboring pixels. Result: soft, slightly fuzzy gradients. The most photographic of the four.
Atkinson
Like Floyd–Steinberg but only diffuses 75% of the error and skips some neighbors. The result is brighter and more contrasty — this is the dither used on the original Macintosh.
Bayer
Uses an ordered matrix (2×2, 4×4, or 8×8) to decide threshold per pixel. The output has a visible regular pattern — looks like a pre-print halftone. Best when you want the pattern visible.
Try It in the Browser
You can experiment with both ordered dithering and error diffusion right now without installing anything via our free Dither Converter.
While the Yan mobile app provides raw numeric controls (Threshold, Bayer Size, Pixel Scale) with multi-layer real-time GPU pipelines, the browser tool delivers a clean Canvas 2D engine with direct algorithm-to-filter mapping:
| Algorithm | Browser Filter | Diffusion Kernel | Output Style |
|---|---|---|---|
| Bayer Ordered | Bitgrain | 8×8 Bayer matrix | Regular crosshatch texture, 3–5 levels |
| Floyd–Steinberg | Cobalt Grain | Standard 4-tap | True 1-bit, balanced tonal gradation |
| Atkinson | Denim Grain | 6-tap (discards 25% error) | True 1-bit, high contrast, classic Mac |
| Custom 3-Tap | Harbor Grain | 3-tap forward | True 1-bit, directional graphic grain |
| Custom 7-Tap | Meadow Grain | Two-row 7-tap | True 1-bit, soft organic dispersion |
In the browser tool, Detail adjusts threshold and quantisation density, Contrast shapes the luminance curve before dithering, and Intensity blends against the original photo.
App Parameters
When using the Yan mobile app, you have access to low-level controls:
Threshold (0–255)
Center point for black vs white. 128 = neutral.
- Lower: more white pixels, brighter overall
- Higher: more black pixels, darker overall
Bayer Size (2 / 4 / 8) — Bayer only
Smaller = chunkier visible pattern. Larger = finer, almost smooth.
Pixel Scale (1–8)
Downsamples before dithering. Higher = bigger, retro lo-fi dots.
Good Subjects
- Portraits: Atkinson gives that classic MacPaint face look
- Landscapes: Floyd–Steinberg keeps tonal range
- Type and logos: Threshold, crisp
- Anything you want to feel printed: Bayer with low size
Recipes
You can dial these in with the mobile app or test similar looks online via Dither Converter:
Original Macintosh
- Atkinson, threshold 128, pixel scale 2
- Looks like 1984 MacPaint
Newspaper Halftone
- Bayer, size 4 or 8, threshold 128
- Print-shop dots
Risograph
- Floyd–Steinberg, threshold ~140
- The slightly imperfect zine vibe
Fax Machine
- Threshold, pixel scale 4
- Pure crunch
What to Avoid
- Subtle gradients you need to keep smooth: pick Floyd–Steinberg, not Threshold
- Very small text: dither and font can fight
Combinations
- Dither + CRT: scanlines on a 1-bit image. Computer terminal from another era.
- Dither + RGB Shift: wait — RGB Shift adds color back. Run dither last for pure 1-bit. Or run RGB first for split-channel dithered chaos.
- Dither + Block Jitter: scanned-and-corrupted printout.
The Idea
Two colors is more than enough. The rest is math.